Practical design guides
Gift Tag Template: Leave Room for a Handwritten Name

A gift tag needs to work after someone writes on it and threads the ribbon. A decorative border that leaves no space for a long name can turn a pleasing design into a difficult packing task.
This guide uses a fictional Alder Workshop tag and an original Ciyo layout demonstration. The dimensions below are example design choices, not a printer’s specification. A physical pen, hole and ribbon test still belongs in your own production process.
Quick answer
Choose the finished size and attachment first, reserve a blank area for the recipient’s name, then place decoration around those working spaces. Make a separate annotated proof for the hole and writing area. Print one plain-paper copy at actual size, cut it out, write a long name and tie it to a sample package before ordering the run.
1. Decide how the tag will be used
A hand-addressed gift tag has a different job from a retail hang tag. It needs a person’s name to remain legible after the ribbon is tied. Product codes, prices and promotional copy are secondary unless you have a specific reason to include them.
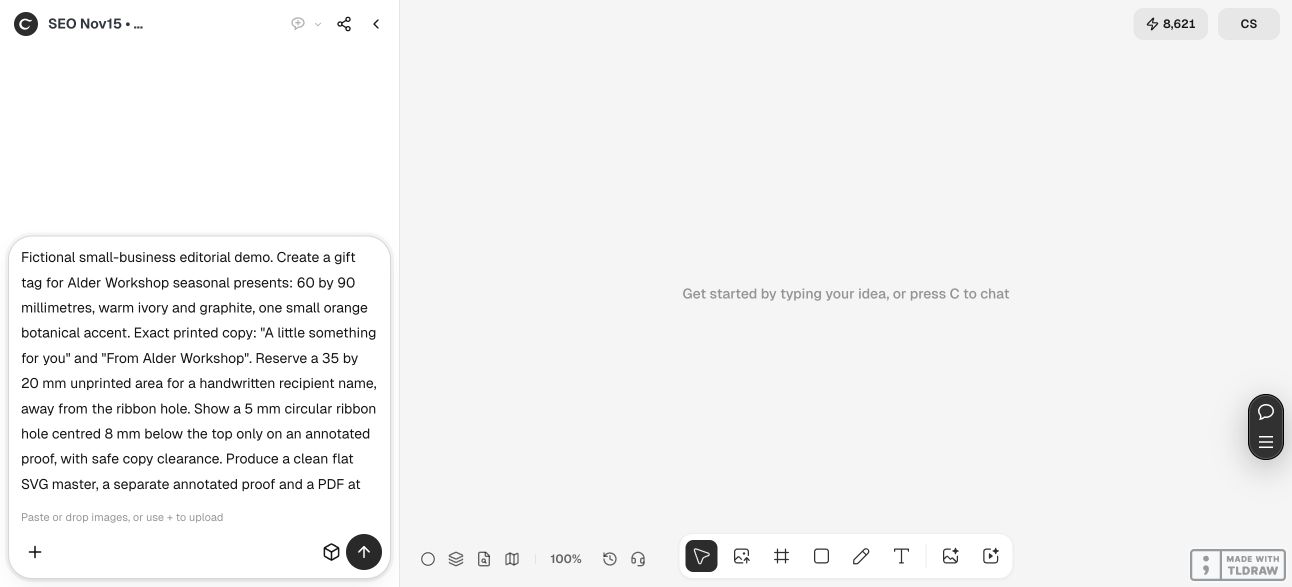
For Alder Workshop, the tag accompanies a seasonal present. The approved printed words are “A little something for you” and “From Alder Workshop.” The recipient’s name is added by hand. We keep a broad light area free of texture, illustrations and printed rules so the person packing the gift has room to write.
2. Reserve the working areas before adding artwork
Start with the actual tag outline. Mark the ribbon hole, the area hidden by a knot and the writing space on a proof layer. A hole marker is a production instruction, not decoration to leave on the clean artwork unless your supplier specifically requests it.
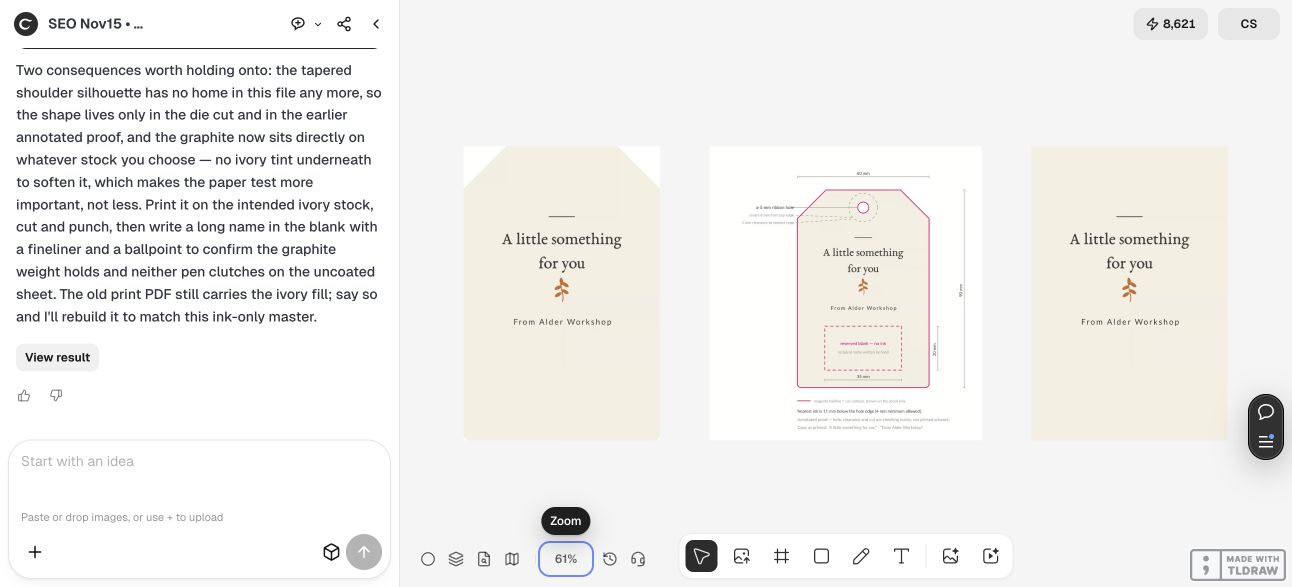
Our example is 60 × 90 mm with a 35 × 20 mm unprinted writing area. Its planning proof uses a 5 mm hole whose centre is 8 mm below the top. These numbers describe this fictional example only. Your stock, punch, ribbon width and printer’s template may require a different arrangement.
| Area | Example decision | Practical check |
|---|---|---|
| Finished tag | 60 × 90 mm | Fits the package without hiding another label |
| Handwriting | 35 × 20 mm blank space | Long recipient name fits with the intended pen |
| Ribbon hole | 5 mm diameter, centre 8 mm below top | Punch, knot and ribbon do not cover the words |
| Printed copy | Greeting and workshop name | Both remain readable after tying |
3. Ask Ciyo for a clean design and an annotated proof
Supply the exact words, finished dimensions and the blank space that must survive. Ask for one clean face and a second version that explains the hole and writing area. Keep those two purposes separate so a measurement line does not accidentally become part of a customer’s tag.
Use a simple shape or an original small motif rather than filling every gap. Inspect the generated design at the intended physical size: thin strokes and faint grey words that look elegant on a large monitor may become difficult to read on a small tag. Retain the source used to make the preview; a canvas image alone is not a guarantee of editable print geometry.
In our live Ciyo run, the first SVG source filled the whole tag with an ivory background, including the handwriting area. We caught that by inspecting the source: a light-colored shape is still artwork, not an unprinted area. We asked for an ink-only master and made ivory the paper-stock choice. Ciyo returned corrected source with no background fill; rendering that source confirmed a fully transparent reserved writing area. The canvas preview uses ivory only to help visualize the stock.
The supplied SVG is the corrected ink-only master. It has live text that depends on EB Garamond and Lato; confirm fonts and the supplier’s production requirements before use. The earlier tinted preview and annotated proof remain on the demo board for comparison. No physical printing or pen test was performed, and the inaccessible PDF mentioned in the chat is not offered as a download here.
Design a [WIDTH × HEIGHT] gift tag for [FICTIONAL OR APPROVED BRAND]. Exact printed copy: [GREETING] and [SENDER]. Reserve a completely unprinted [WIDTH × HEIGHT] area for handwriting. On a separate annotated proof, show [HOLE DIAMETER AND POSITION] and keep the knot clear of text. Return the clean artwork and proof separately, explain which files are actually available, and flag any missing supplier specification. Do not order or claim a physical test.
4. Test the tag with the package and pen
Print the proof at actual size on ordinary paper first. Measure a known dimension with a ruler so a fit-to-page setting does not quietly shrink it. Cut the outline, punch the proposed hole and thread the ribbon you plan to use. Check both the hanging position and the knot’s footprint.
Write a short name and a longer one using the intended pen. On your real stock, allow the ink to dry and check whether it smears or feathers. The blank area is useful only if the paper accepts the writing. A digital preview cannot establish that.
For a small batch, a single shared greeting plus handwritten names may be easier to maintain than many personalized files. For a larger operation, create a controlled recipient list and proof the longest name before duplicating the layout. Avoid placing recipients’ private details in a shared design board unnecessarily.
5. Hand off the approved version
Use your chosen supplier’s current template and file requirements for trim, bleed and cutting. Give them the clean artwork plus a clearly identified technical proof if needed. Do not infer die-cut or printer support from a generic gift-tag template.
Name the approved version so the packer and printer can find the same file. If you move the hole or change the copy, repeat the plain-paper test. The acceptance question is concrete: can someone read, address and attach this tag without covering the important information?
Questions about printable gift tags
What size should a gift tag be?
Choose a size that suits the package, writing and attachment. The 60 × 90 mm example in this guide is a design choice, not a universal standard or a printer compatibility claim.
Should the hole be printed on the final artwork?
Keep a marker on a separate technical proof unless the supplier’s instructions call for it in a specific production layer. A visible guide can otherwise end up on the finished face.
Can I print a name instead of handwriting it?
Yes. Keep the name editable, approve the recipient list and test the longest name. Recheck the space hidden by the knot after personalization.
Does an AI preview replace a physical proof?
No. The preview helps with layout. Actual stock, ink, punch position and ribbon need a physical check before you commit to a run.
Make one usable tag proof
Give Ciyo the approved greeting, finished outline and space for a name. Review the clean design beside its attachment proof.