Image editing · Quick Edit
Change One Detail in an AI Image Without Starting Over
The image is almost right, but the client wants the notebook in green. Generating a new image from the original prompt usually changes far more than the colour: the angle, the props, the light. An edit instruction on the existing image keeps what you already approved.
This guide changes a fictional Fold notebook's cover from ivory to sage green with Quick Edit in Ciyo. We ran it on September 18, 2026. The screenshots show the actual instruction and result, compared at the same size as the source.
Edit when the rest is approved
Use an edit when most of the image is already accepted and one attribute must change: a colour, a material, a small object. Use a new generation when the composition itself is wrong. Mixing the two, such as asking an edit to change the colour and the camera angle at once, makes the result hard to judge.
Write down the one change and everything that must stay. That list becomes both the instruction and the review checklist.
Open Quick Edit and describe the change
Select the image on the Ciyo canvas and choose Quick Edit in the image toolbar, or press Tab. A text box opens under the image with the prompt "Describe your edit here" and a Run button.
Name the one change first, then the things that must not change. Be concrete: "the pencil cup" and "every shadow" are easier to check than "everything else".
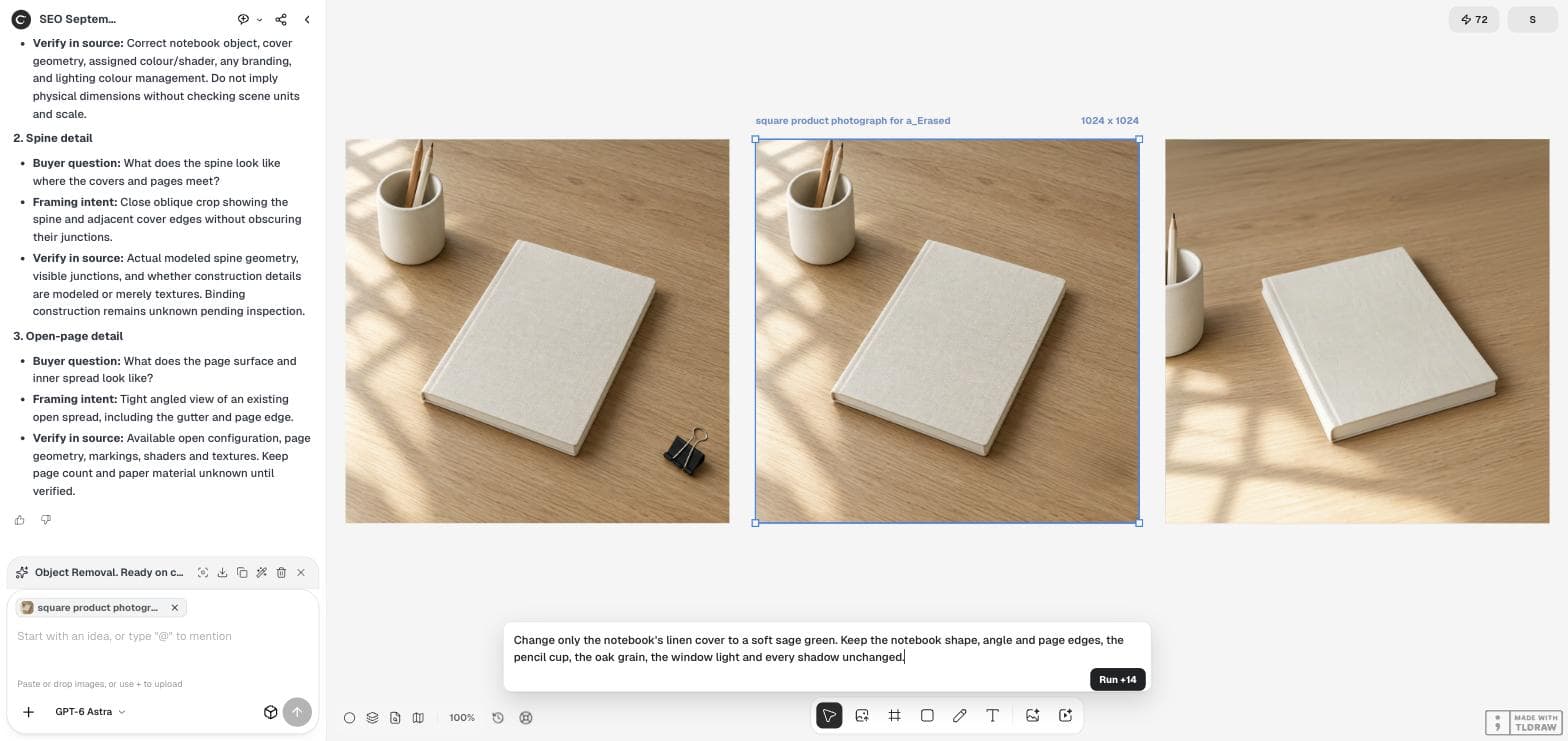
Change only the notebook's linen cover to a soft sage green. Keep the notebook shape, angle and page edges, the pencil cup, the oak grain, the window light and every shadow unchanged.Compare the result with the source
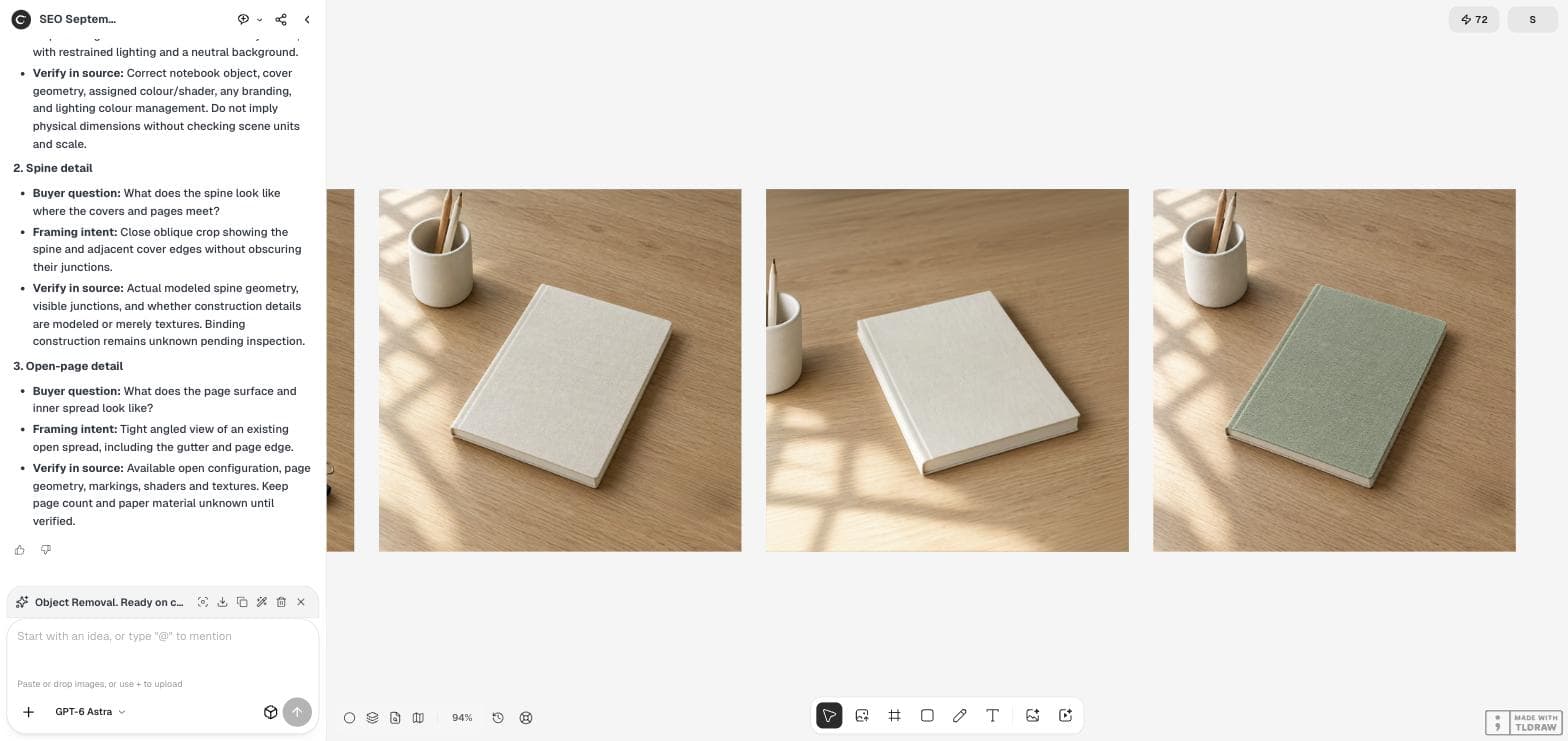
The result appeared as a new image. The cover was sage green with its linen texture intact. The page edges stayed ivory, and the angle, pencil cup, oak grain and window light matched the source closely at normal viewing size.
Always compare at the same size, side by side. Small shifts in shadows or props are easy to miss when you look at the new image alone.
Check the changed and unchanged parts separately
Review the requested change first: is the colour right, and does it cover the whole object without spilling onto other parts? Then check every item on your keep list. A successful colour change can still fail if a prop moved or the light changed.
For brand colours, compare against the approved colour value in your design file. "Sage green" from a model is an interpretation, not a matched swatch.
| Item | Requested | Result |
|---|---|---|
| Cover colour | Soft sage green | Changed, texture kept |
| Page edges | Unchanged | Stayed ivory |
| Notebook shape and angle | Unchanged | Matched at normal size |
| Pencil cup, grain, light | Unchanged | Matched at normal size |
| Exact brand colour | Not specified | Not verified |
Make one change per edit
If you need two changes, run two edits and review after each. When one combined edit goes wrong, you cannot tell which part of the instruction caused it. Separate edits also leave a clear trail on the canvas.
Keep the source image. Each edit creates a new image, so you can return to the approved version at any time.
Chained edits can drift. On September 17, 2026, a post in r/grok titled "I Changed One Number 8 Times in Grok Imagine | Watch the Entire Image Degrade" documented a repeated-edit experiment in another tool. Edit from the approved source rather than stacking edits on edits.
A Grok Imagine user's repeated-edit experiment. It concerns another product; we did not measure degradation in Ciyo.
Know when to use a different tool
Quick Edit is a general instruction on the whole image. For a precise area, such as moving one object, Move Object lets you select the region first. For a strict reference-based change with a preservation checklist, GPT Image 2.5 Sunburst's reference editing is another route.
Quick Edit is a metered action. Check your credit balance before and after an edit, especially when you plan several rounds.
Quick Edit questions
Does Quick Edit replace my image?
No. In our run the edited version appeared as a new image, and the source stayed on the canvas.
Can Quick Edit match an exact brand colour?
Not reliably from a colour name. Compare the result against your approved colour value and adjust it in a design tool if needed.
Why not generate the image again with a new prompt?
A new generation can change the composition, props and light. An edit keeps the approved image and changes one detail.
Change the detail, keep the image
Open your image in Ciyo, describe one change with Quick Edit and compare it with the source.