Photo editing · Object removal
Remove an Unwanted Object from a Product Photo with AI
A good product photo can be spoiled by one small thing: a binder clip at the edge of the desk, a cable, a price sticker. Reshooting takes time. An AI eraser removes the object and fills the space, but the fill needs a careful look before the photo goes on a product page.
This guide removes a stray binder clip from a fictional Fold notebook photo with the Eraser in Ciyo. We ran it on September 18, 2026; the screenshots show the actual mask and result. At the time of the demonstration the Eraser showed a cost of 3 credits before running.
Decide what should leave the frame
Look at the photo as a buyer would and name the one object that does not belong. In our square photo, a black binder clip in the lower right corner pulled attention away from the ivory notebook. The pencil cup stayed, because it adds scale and context.
Remove one object at a time. Several removals in one run make it harder to see which fill caused a problem.
Select the image and open the Eraser
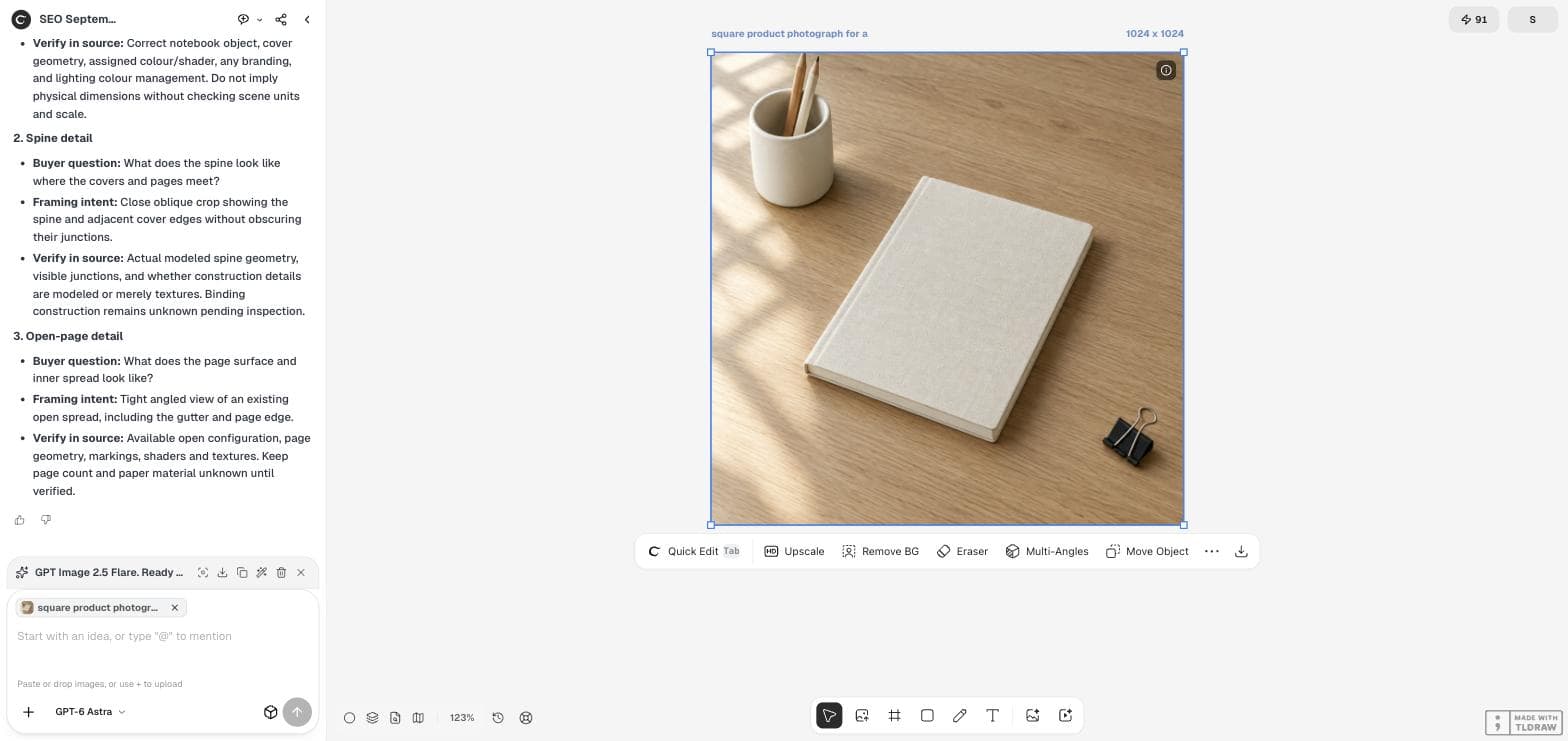
Click the photo on the canvas with the Select tool. The selected-image toolbar shows Quick Edit, Upscale, Remove BG, Eraser, Multi-Angles and Move Object. Choose Eraser; a small panel opens with a brush-size slider, Cancel and Run.
If the Eraser panel does not appear, check that the Image Generator tool is not still active. Switching to the Select tool and selecting the image again opens it.
Paint a mask slightly larger than the object
Brush over the whole object, including its shadow. A shadow left behind looks like a stain once the object is gone. Extend the mask a little beyond the edges, but keep it away from anything that must stay unchanged, such as the corner of the product.
The purple mask shows exactly what the model may repaint. The Run button stays disabled until you paint, and it shows the credit cost before you commit.
Compare the result with the original
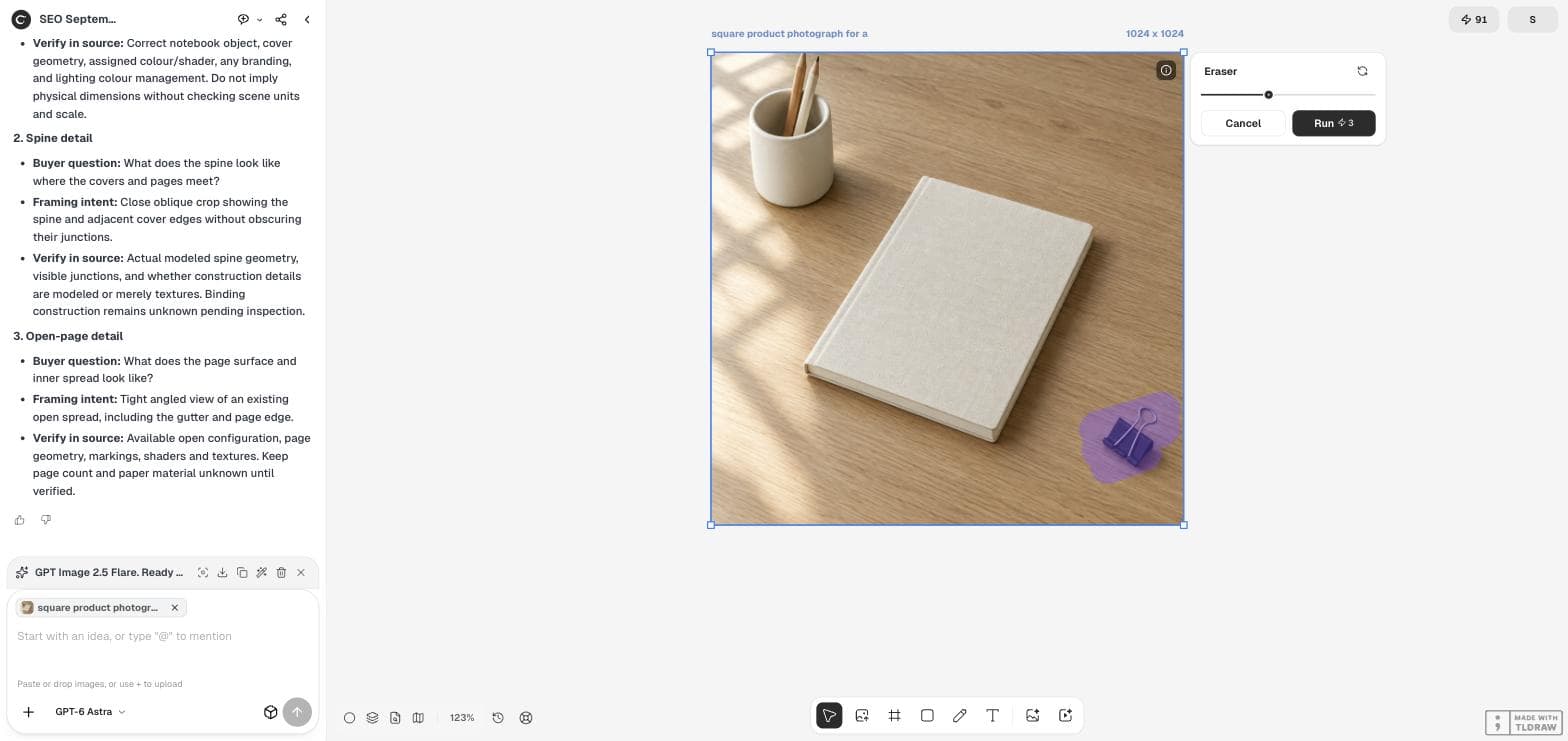
Ciyo places the result beside the source instead of replacing it, with "_Erased" added to its name. The binder clip was gone and the oak grain continued across the space. The notebook, pencil cup and window light were unchanged.
Keep the original. If a later step goes wrong, you can return to the untouched photo.
Zoom into the repaired area
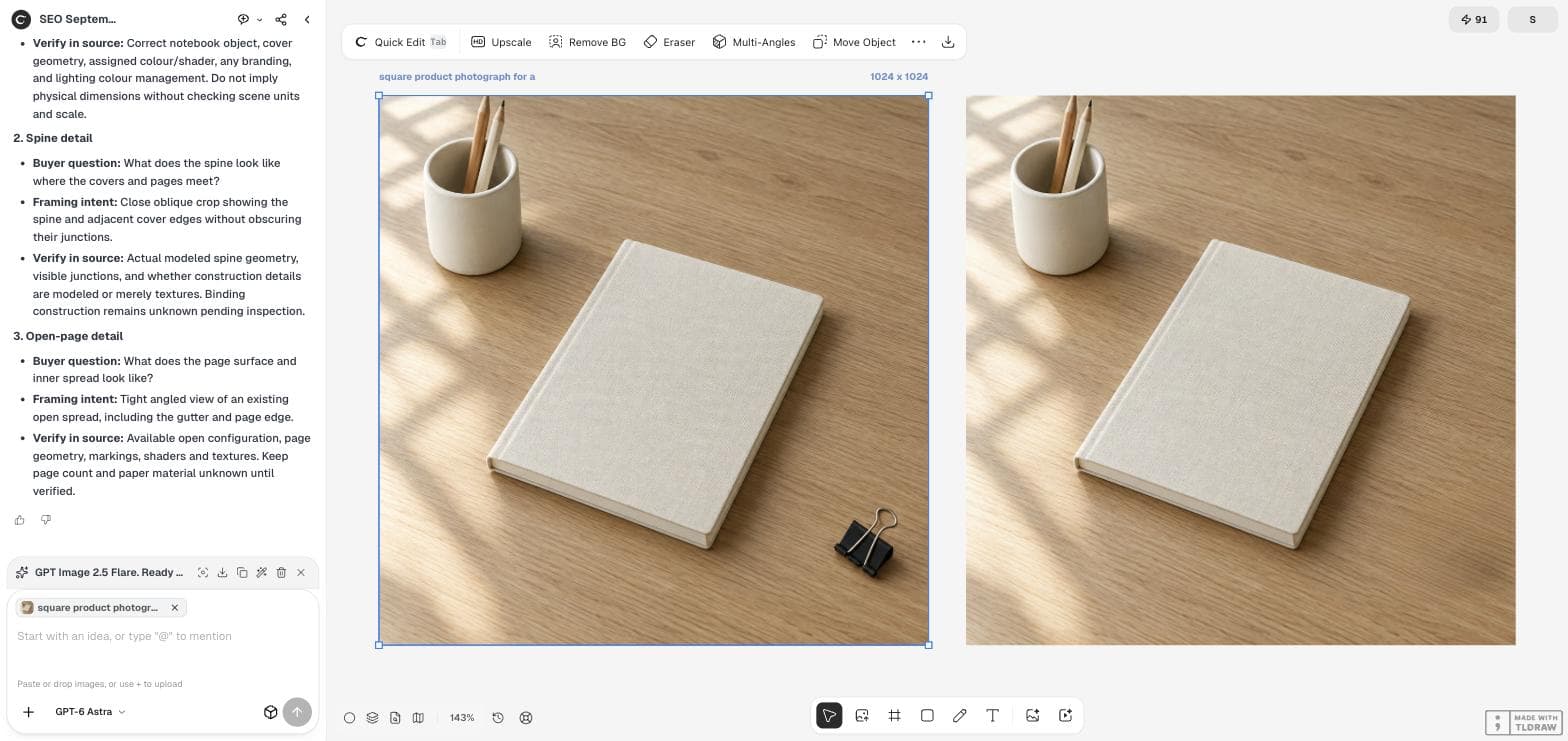
Zoom the canvas in on the spot where the object was. In our result the grain was continuous, but a slightly darker, softer patch remained where the clip had been. At normal viewing size it was hard to notice; on a large product page or a print it could be visible.
Use this checklist before you publish.
Professionals apply the same inspection. On September 16, 2026, a photographer in r/RealEstatePhotography reviewed a low-cost AI editing service and reported sloppy window pulls, overly dark shadows and colour shifts between photos, adding that zooming in made the problems more obvious. A cheap or fast edit still needs a close look.
| Check | Look for |
|---|---|
| Texture | Blurred or smeared grain, fabric or paper where the object was |
| Light | Leftover shadow or a patch darker than its surroundings |
| Edges | Changes to nearby products or props |
| Repetition | Copied patterns that repeat too neatly |
| Size | The fix still holds at the largest size you will publish |
A photographer's review of another company's AI photo-editing service. It concerns that product, not Ciyo's Eraser.
Choose the right tool for the next problem
Eraser removes and fills. If the object should stay but in a different place, use Move Object instead. If the whole background should go, use Remove BG, which cuts the product out rather than repairing a small area.
For a catalog, run the same removal steps on every photo in the set and review them together, so each fill matches the others.
Object removal questions
Does the Eraser overwrite my original photo?
No. In our run the result appeared as a new image beside the source, named with "_Erased".
Is the Eraser free?
No. It is a metered action. The Run button showed 3 credits in our demonstration; check the button for the current cost.
What if a smudge remains?
Paint a slightly larger mask that includes the smudge and run the Eraser again on the result, or keep the photo at a size where the patch is not visible.
Clean up the photo you already have
Open the photo in Ciyo, paint over the distraction with the Eraser and check the repaired area.