Garment image editing
Compare a garment silhouette before and after an image edit
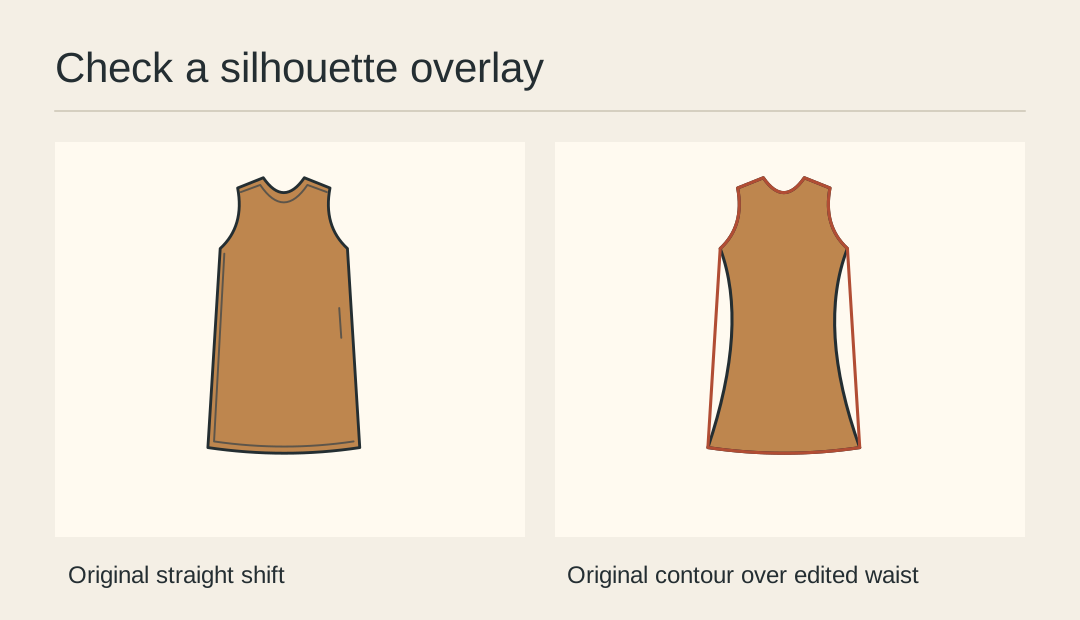
Two campaign images can feel alike while one has a narrower waist. An outline overlay makes a local shape change visible. It works best when both images originate from the same camera frame and the garment is meant to stay fixed.
Prepare a common frame
Place both images on canvases of the same dimensions. Record any deliberate crop or resize applied to the candidate. Undo that global change for the comparison where possible.
Align two landmarks
Match the neckline centre and one shoulder tip using position and uniform scale. Then inspect the opposite shoulder. If only a perspective warp can align them, the candidate needs a closer look before measuring the waist.
Trace the source edge
On a review layer, draw a thin line along the original side seams and hem. Use a colour that stands out from the candidate. Leave the source untouched beneath the review layer.
Inspect local divergence
Toggle the candidate beneath the line. Note where a side seam moves inward while both nearby anchors remain aligned. A consistent shift everywhere more often indicates a registration error.
Check at listing size
Look at the unmarked pair at the size a buyer will encounter. If a straight shift reads as a fitted dress, the edit changes a buying decision even when the displaced edge covers only a narrow strip.
Record the disposition
Save the marked view with a short note identifying the changed seam and the selected replacement. Return the clean, approved frame to the poster designer.
Review the marked candidate
Keep the source, overlay and clean delivery version together on the board.